How to install solar panels in 7 easy steps
This article will walk you through How to install solar panels in 7 easy steps. Once installed, solar panels will create clean energy and reduce your electric bills for many years while requiring almost no maintenance.
If you enjoy do-it-yourself tasks, you might want to install (or perhaps build) your own solar panels. However, unless you’re a very competent do-it-yourselfer with extensive experience in construction and electrical work, you should engage a professional installer to install the solar panel array of your choice. In any event, knowing the benefits and cons of rooftop and ground-based solar arrays, as well as having a general understanding of how to install panels, will help you make the move to solar electricity.
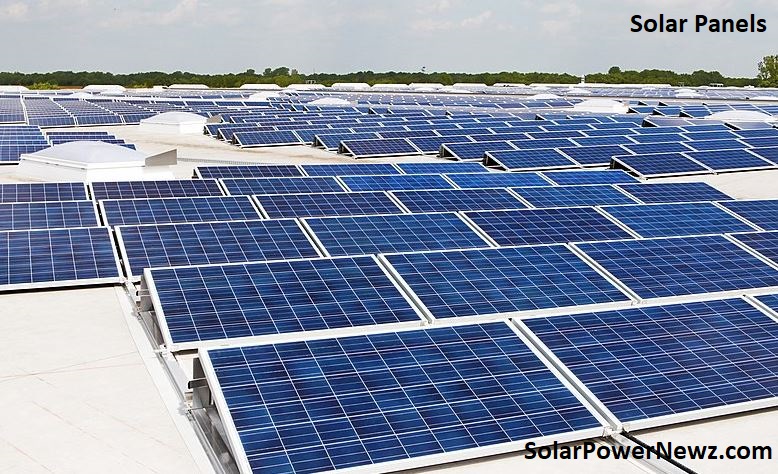
Table of contents
- Important takeaways
- The 7 easy steps:
- Check to see if your roof is acceptable.
- Choose a type of solar panel system.
- Calculate the installation costs.
- Buy the system
- Arrange for permits and approvals.
- Carry out the installation work.
- Turn on your system.
- Final analysis
- Obtain Permission to Operate (PTO)
- After the installation
Let’s get started!
Important takeaways
- Begin by determining where solar panels will be erected. Regrettably, not everyone has access to a proper roof.
- Choose a type of solar panel system: ‘grid-tied’ for cost savings or’solar + storage’ for energy independence.
- Purchase the system from a competent solar installation after assessing your costs.
- Make an application for the relevant permissions, approvals, and incentives.
- Install the solar panels on your roof – this should take one or two days if you’re working with a contractor.
- Pass a system examination and get permission to connect to utilities.
The 7 easy steps:
- Check to see if your roof is acceptable.
- Choose a type of solar panel system.
- Calculate the installation costs.
- Buy the system.
- Arrange for permits and approvals.
- Carry out the installation work.
- Turn on your system.
Step 1: Check to see if your roof is acceptable
The first easy step in installing solar panels is to locate an appropriate location for the panels. Sadly, not everyone has a roof that is adequate.
Ask yourself the following questions:
- Is there enough sunshine on the roof? You want the solar panels to get lots of sunshine, especially during the hottest part of the day. Avoid any location that will be shaded for an extended amount of time. For best effects, the roof should also face South at an appropriate inclination. Determine your home’s solar potential.
- Is there enough space? To mount the solar panels, you’ll need a relatively large area. Typical residential installations necessitate between 270 and 341 square feet of surface area, though you may require more if your energy consumption is really high.
- Can solar panels be installed on the roof? Your roof must be robust enough to support the weight of the solar panels, racking equipment, and installation personnel. Before installing a solar system, all essential structural upgrades should be made.
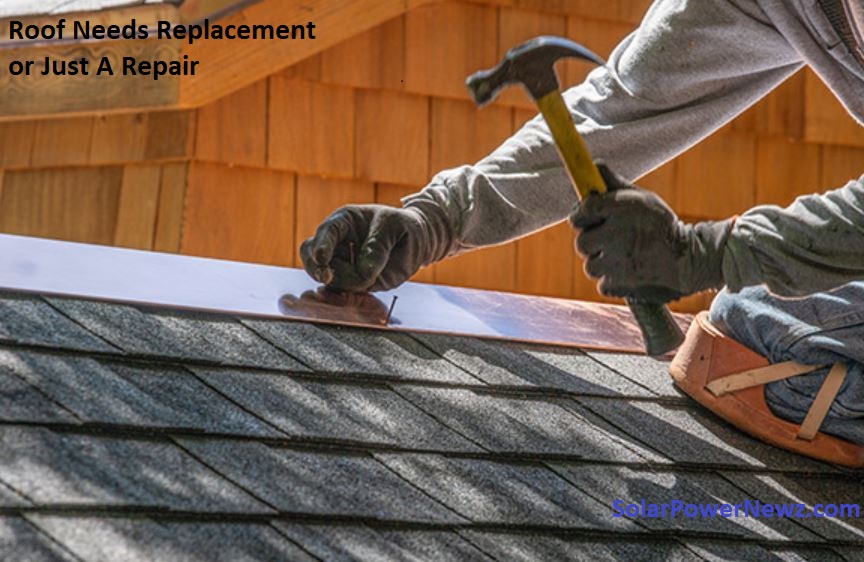
- How old is it? If your roof has to be replaced, you should do it before installing solar. While it is possible to remove and reinstall solar panels, it is time-consuming and costly.
- Is there a better option? If your roof isn’t suitable, you might be able to relocate the panels. Put them on any structure with an adequate surface, such as a barn, shed, gazebo, or carport. Consider a ground-mounted installation if you have the space. When completing an initial site inspection of your property, a solar installation firm will take all of these aspects into account.
Step 2: Choose a type of solar panel system
Aside from seeking clean, renewable energy, what do you actually want from solar panels? Financial savings or energy independence and comfort?
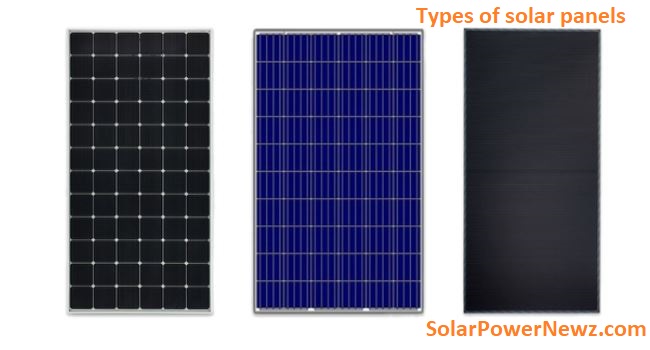
Choose the solar panel system type that’s ideal for your goals before you start your installation. If you’re unsure, a professional solar installation provider can assist you.
Grid-connected systems are the most cost-effective in terms of energy savings
Do you want to save as much money as possible while also earning a high return on investment (ROI)? If so, you are not alone; saving money on power bills is the number one reason households choose to go solar.
Installing a grid-connected solar power system will help you attain this goal. To handle power surpluses and shortfalls, these solar systems rely on the electrical grid and net metering.
Installing grid solar panels can save you $20,000 to $80,000 in electricity expenditures over a 25-year period, depending on your situation.
Solar + storage is the best option for energy independence and backup power.
Do you want to install a solar panel system to store energy and provide power during power outages? In that situation, you should consider installing a solar + storage system, which combines solar panels with a battery backup.
Just keep in mind that solar batteries are not cheap. Even with a daily-use solar battery that qualifies for incentives, you’ll break even at best. A single Tesla Powerwall costs around $13,000 with installation; depending on your circumstances, you may need two.
Step 3: Calculate the installation costs
You’re ready to estimate installation expenses now that you know what kind of system you want!
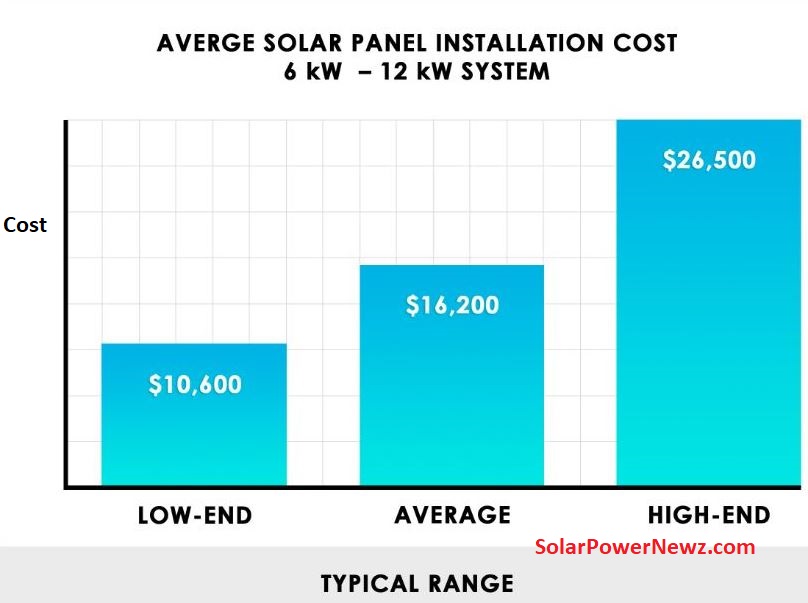
Grid-connected systems typically range in price from $15,000 to $25,000. Solar + storage systems are more expensive, ranging from $25,000 to $50,000. Remember, these data are solely for reference purposes. The cost of solar installation varies based on where you reside, the business you choose, and the number of solar panels you require.
You must also consider solar incentives and rebates that reduce installation expenses. The federal tax credit, which can save you up to 30% on your purchasing prices, is the most essential incentive to be aware of. The tax credit can reduce the cost of a $20,000 installation to as little as $14,000!
Many governments provide additional assistance to households that choose to go solar. In New York, for example, you can get a 25% state tax credit as well as exemptions from property and sales taxes. Don’t forget to look into initiatives provided by your local government and utilities. You might be amazed at the types of incentives and rebates available!
Step 4: Buy the system
We suggest you to buy your system from a company that offers full-service solar installation.
They will create a system that satisfies your requirements, arrange for permits and permissions, and finish the installation. They could also provide you suggestions on how to take advantage of any deals and rebates that are offered.
Naturally, there are other ways to buy solar panels. For instance, if you wish to instal your own solar panels, you can get the necessary tools from a seller of wholesale solar equipment.
Step 5: Arrange for permits and approvals
Before beginning work on any big home improvement project, you’ll need to secure the necessary permits and approvals.
Typically, you’ll be applying for the following jobs:
- Building permit(s)
- Electrical permit(s)
- Permission from your electricity utility
- Incentive program applications
- Post-installation inspection
In most cases, you’ll need to submit a design for your solar panel installation, which must be code compliant. The specific requirements will vary depending on where you live and the conditions set by the local government (AHJ).
All installation-related permits and permissions can be handled by your solar business.
Step 6: Carry out the installation work
You are finally ready to begin the installation procedure!
If you use a professional solar provider, installation should take one or two days. The work can only be done if the weather is clear – electrical work on rooftops should be avoided if there is even a slight probability of rain!
- Making preparations for safety. Heights, slick surfaces, high-voltage equipment, and handling power tools and heavy equipment are all concerns when installing solar panels. Before beginning an installation, ensure that all personal safety equipment and fall prevention measures are in place.
- Set up solar panel racking. Racking systems must be built directly on the roof to secure the panels. Racking must be installed with extreme caution because it is drilled straight into the roof. If done incorrectly, it might cause roof leaks or damage to electricity lines.
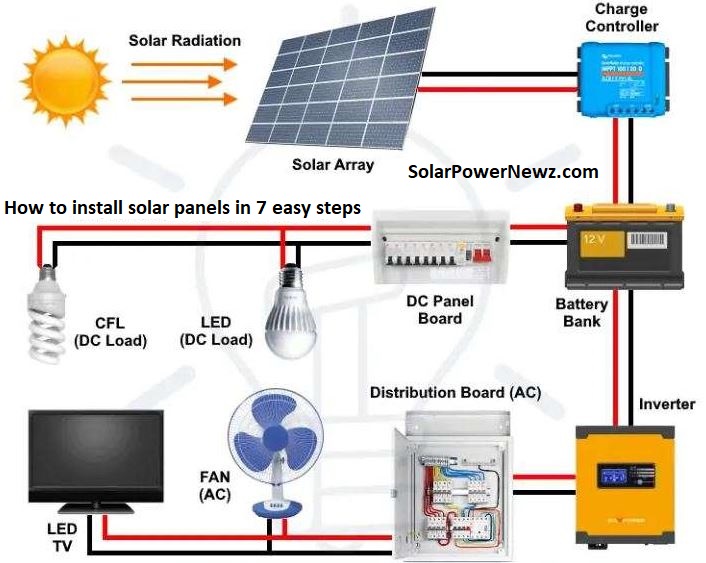
- Connect the module-level electronics. Microinverters and power optimizers are examples of module-level power electronics (MLPE), which are small devices that are attached to each individual solar module (panel). They are required by electrical code and useful for optimising panel performance. Microinverters convert direct current (DC) electricity from panels to alternating current (AC) electricity that can be used in your home.
- Install the solar panels. Check the wiring before putting the solar panels to the mounting rail. Each solar panel has a negative and positive DC wire attached; clip or zip-tie them to the panel before wiring them to the MLPE. Insert the mid-clamps and end-clamps into the railing to secure the panels.
- Connect the system’s wires. The wiring from the solar panels are routed to a junction box on the roof. They will then proceed down a conduit to the external junction box. The junction box then connects to an emergency disconnect, which connects to the main electrical panel. Make certain that the external junction box and emergency disconnect box are waterproof and conveniently accessible.
This is a typical rooftop solar system installation. The procedure may differ for you, particularly if you are installing ground-mounted solar panels.
Step 7: Turn on your system
Your solar panels have been installed, but they are not yet operational. There are a few more hurdles to clear before you can turn them on.
Final analysis
Schedule an inspection with your local authority having jurisdiction (AHJ). They’ll dispatch an inspector to verify that your system fits the previously filed design drawings, as well as that it complies with local rules and codes.
Obtain Permission to Operate (PTO)
The PTO enables utility connectivity, allowing you to link your solar power system to the utility grid and import and export electricity.
The utility company will either install a second metre or replace your existing one with a bi-directional (or net) metre, which will allow you to track your solar power exports. To activate the system, follow these steps:
- Flip the breakers: On your electrical panel, there will be breakers for the solar panels, most likely branded “PV system” or “Solar PV” (PV is short for photovoltaic solar panel system). Turn them around!
- Turn on the battery and inverter: Some battery storage and inverters have their own ‘ON’ buttons, which you should also press.
- Toggle the disconnect: Turn on the emergency disconnect to complete the system circuit and allow energy to flow from the panels. You should be generating solar energy today!
- Examine the inverter app: Finally, use your solar monitoring app to ensure that everything is functioning properly. These apps connect to your solar inverter(s) to display real-time solar panel performance and energy usage. If a solar business instals the system, they will handle all system activation requirements, including obtaining the PTO. We recommend going with a local solar business because they will be the most familiar with the rules and regulations in your area.
After the installation
Overall, installing solar panels will take between two and six months. Your solar panels will generate power for at least 25 years after they are installed, giving considerable protection against escalating energy bills.
Once the panels are placed, you won’t have to bother about regular upkeep. Solar panels normally do not require maintenance beyond being cleaned twice a year if rain does not suffice. If any problems emerge, you can request that your installer inspect your system.
So, what are you holding out for? Use the solar calculator below to estimate your home’s 25-year solar panel savings and get started on your solar installation!